
As teachers, no matter the content area, we frequently find ourselves with too much to teach and not enough time to teach it all sufficiently. That is definitely the case in my 6th grade World Geography class, so when we got to sub-Saharan Africa, I had to get creative to make sure we hit everything we needed to before spring break. To that end, a project using “fact flaps” was born.
Use “fact flaps” in social studies to cover a lot of material in a short time
My students were divided into groups representing East Africa, Central Africa, West Africa, and Southern Africa. Each group first spent half a class on their region’s physical geography and then went a gallery walk for its history. The next day they were introduced to the project for their region’s modern day life.
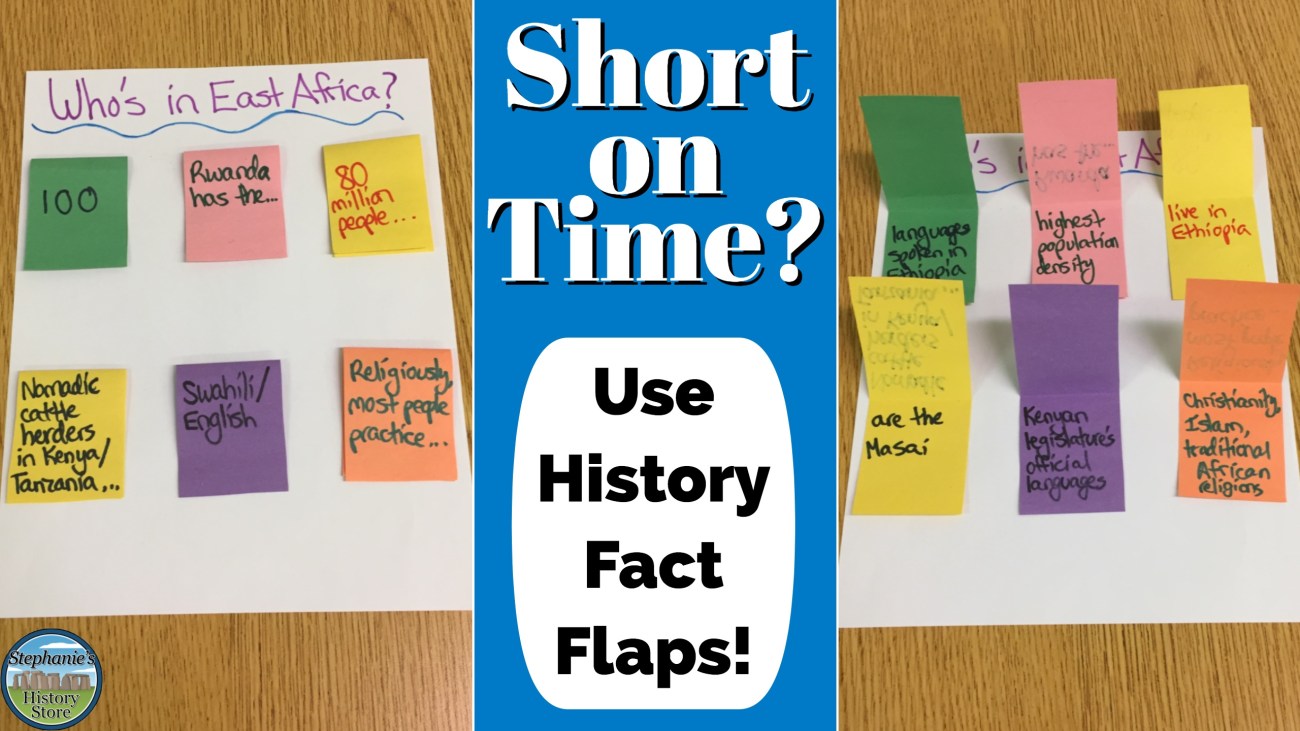
Each group had a list of items they needed to learn about their region (such as average life expectancy, environmental challenges, ethnicities, languages, religions, economy, government, art, traditions, etc) and they wrote it all up on “fact flaps.”
My students took two days to research and put their flaps together and then they presented their whole region–physical geography, history, and modern day life–to the rest of the class (the presentations and summaries took one more 90 minute block). During each group’s presentations, the students in the audience took notes in outline maps of each region.
Afterwards, I grouped my kids up one more time and they wrote an academic summary for each region as a whole (each component was at least two paragraphs: physical geography, history, and modern day life) based on the notes they took (each group had at least one member from each original region-based group). After I checked through them, I copied and stapled each summary as a packet, distributed them, and told the class that information was fair game for the next test. Overall I think it worked well enough to try again, and it was different enough from what they’re used to that my 6th graders stayed engaged in the project and their region all week.
The picture above is just an example. Most groups used about 4 pieces of printer paper with flaps of different sizes on them. One group even made a booklet in the shape of their region. Each group also decorated some parts of the blank space on their papers with images related to their region, decorative words, and doodles. Effort definitely counted towards their grade, as well as how well they worked together as a group.
How do you try to hit everything you need to before the year ends? I’d love to read your ideas in the comments!
Categories: Teaching

How do you use gallery walks to cover a region’s history? I’m interested in using this lesson sequence with my sixth graders next year.
Thank you for sharing all you do! I found your blog on Pinterest and I am so in awe. I teach 6th World Cultures Geography, 7th TX History, and 8th US History and every year, getting through the material without resulting to lecture-worksheet-test feels like such a struggle. I would LOVE to pick your brain, you have no idea!
LikeLike
Hi Kelly! Wow, we teach the same classes, that’s awesome! Definitely email me at stephanieshistorystore@gmail.com and I’ll happily go into more detail and I’ll see what I can send you 🙂
LikeLike